Hi everybody, this post runs you through a fast-tracked data upgrade process for AX 2012 to D365 Finance and Operations.
What we get at the end of this process is a functional Proof of Concept D365 Finance and Operations environment containing your existing AX 2012 data - including all your custom tables and fields.
The example I’ve used here took a little under 10 hours. Starting from a refreshed sandbox environment to a functioning D365 proof of concept using the scripts provided.
I want to re-iterate that this is a proof of concept data upgrade only and does not include any custom functionality you may have in AX 2012, please work with your Dynamics Partner to perform a full code and data upgrade.
Coupled with the Microsoft Dynamics Migration program - https://dynamics.microsoft.com/en-au/migration-program/ use this guide to get your upgrade started sooner.
Get a D365 Environment
To begin the process you will need to provision a D365 environment – one that you have access to manage via Lifecycle services (a Trial environment will not work for this task).
Apply for a trial Lifecycle Services project as mentioned here:
Ensure you have an active Azure Subscription.
Provision a cloud hosted Demo environment.
https://docs.microsoft.com/en-us/dynamics365/fin-ops-core/dev-itpro/deployment/deploy-demo-environment
Note: this is a consumption based environment, which means you will pay for the compute time. To reduce costs – ensure you shutdown the environment when it’s not in use. The Auto-shutdown setting in Azure is highly recommended so the VM isn’t accidentally left on.
AX 2012 Data Upgrade Quick-start
The standard process is long-winded and requires installing irrelevant updates to get the upgrade checklist installed.
I have included scripts to streamline the process and reduce time to completion.
XPO to install upgrade checklist and begin upgrading your data. (No need to install all Microsoft updates. This is only for AX 2012 R3, I haven't included an XPO for R2)
If you have Virtual companies – you will need to use the Virtual companies migration XPO (provided) to export the data from the virtual companies and re-import into each individual company.
To upgrade all of the database custom tables and fields – use the XPO provided which creates the D365 objects for all your custom AX 2012 data model.
Database backup (AX2012) and Restore (D365) automation scripts.
1 - Import XPOs into AX 2012 Sandbox environment
Copy current Production Modelstore and Data into Sandbox first.
Import each XPO
SharedProject_E2_D365UpgradeChecklist
SharedProject_E2_AX2012DataObjects
SharedProject_E2_MigrateVirtualCompanies (only required if you have virtual companies in AX 2012)
Or Import all Data upgrade objects in a single XPO
SharedProject_E2_D365UpgradeObjects
2 - Pre-data upgrade steps
These steps can be performed inside the AX 2012 Sandbox Environment after the XPOs in Step 1 have been imported.
Run Upgrade checklist
System Administration Menu -> Setup -> Checklists -> Dynamics 365 for Unified Operations data upgrade checklist


This is the standard Upgrade checklist, it ensures that the business Database contains the appropriate model data before we export it.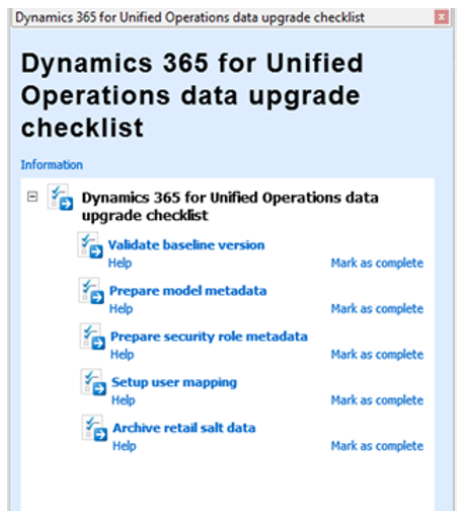
Users are also able to be mapped to AAD logins (using email address) which is the authentication method that D365 uses.
Ensure you run through each checklist item and confirm they are marked as complete before moving on to the next step.
Migrate Virtual Company Data
System Administration Menu -> Periodic -> D365 Upgrade – Migrate Virtual Companies
Because D365 no longer supports virtual companies this is one of the custom scripts I’ve provided to simplify the process of moving data out of the existing virtual companies within AX 2012.

It exports the virtual company data from each virtual company, removes the legal entities from those virtual companies and then re-imports the data directly into each individual legal entity.
This process could take a while, depending on your Virtual company setup and volume of data.
Create Custom Table and Field Objects for D365
System Administration Menu -> Periodic -> D365 Upgrade – Create Data Objects
During the D365 data upgrade, the database is synchronised and any unknown tables and fields are dropped out of the database.
This process generates a copy of your custom database schema (all non-standard tables and fields where you may have data populated) to ensure this data is upgraded and not lost during the data upgrade process.

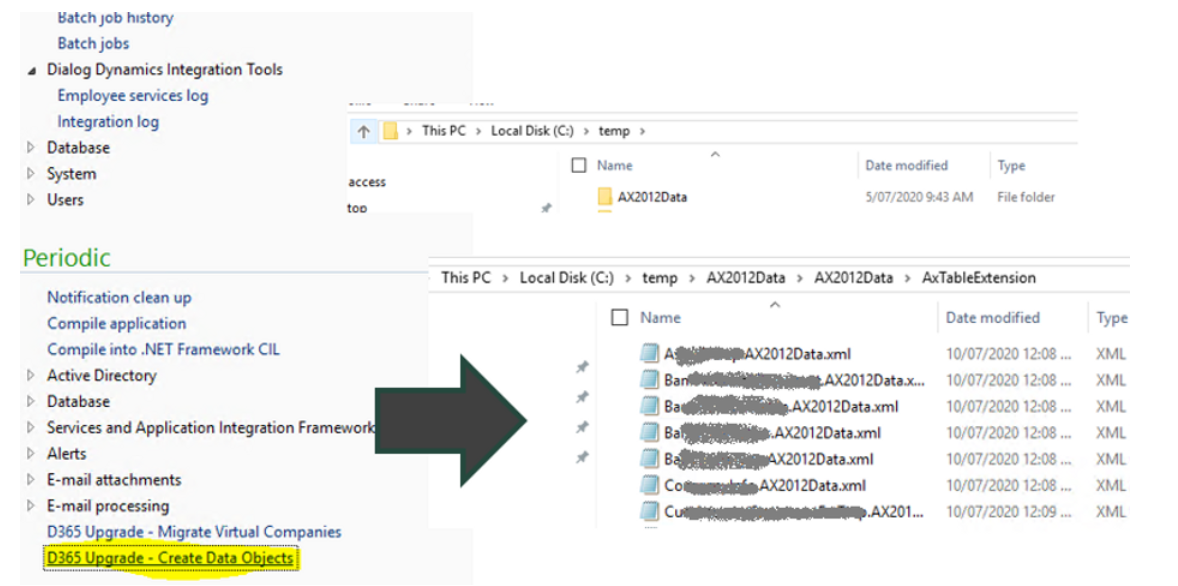
The output of this step is a new AX2012Data folder in c:\temp on the computer you run this from. This folder needs to be retained and copied to the D365 environment later.
3 - Backup AX 2012 Database
This step is a simple database backup, I have provided a SQL script to quickly generate the backup file. 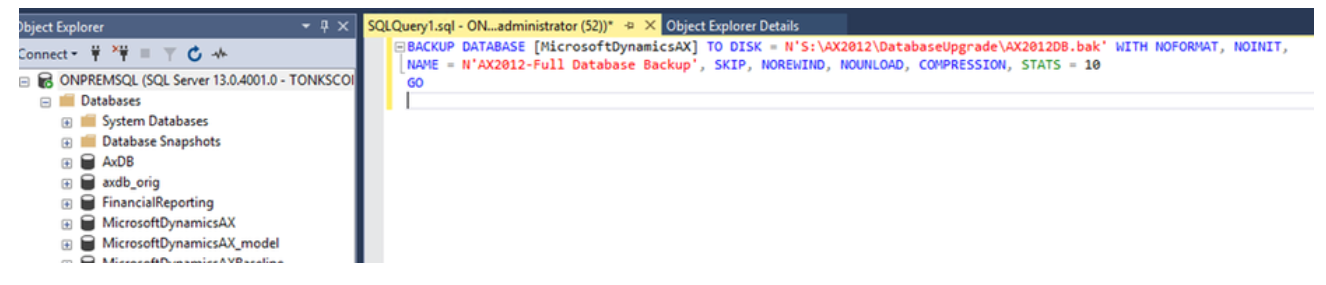


A manual SQL backup will also work for this step (ensure you compress the backup to reduce the size). 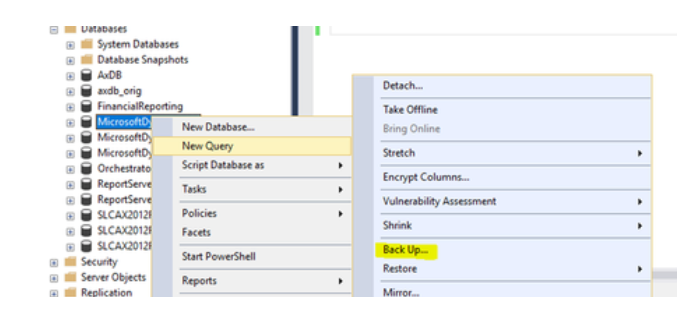
Once the .bak file is created, it needs to be placed somewhere the D365 cloud hosted environment can access it. Lifecycle services (https://lcs.dynamics.com) is the logical place for this, as it contains an asset library and it also provides an opportunity to get more exposure to the tool you will be using for any environment management tasks in D365 going forward. 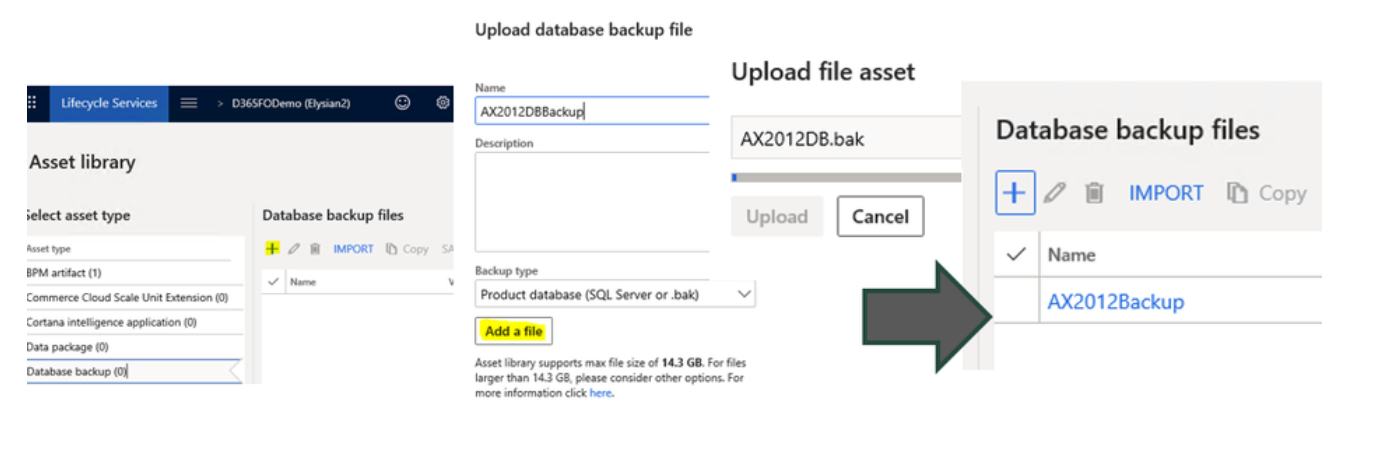

Please note that the Asset library has a file limit of 14.3GB. If your compressed backup exceeds this size then you will need to use an alternative method to get the database backup file onto the D365 environment.
Let's get D365 Started
Before we move onto the next step – confirm you have the following accessible:
The AX2012Data folder
This is important if you have custom tables and fields. Without this all those tables and fields will be dropped and the data in them will not be available in D365.
The AX2012 Database backup from the previous step.
The latest AX 2012 Data upgrade deployable package from LCS
This contains the scripts and tools that will execute the upgrade process in D365. (You may need your partner to provide this to you.)
4 - Prepare D365 for upgrade
The next part of the process for a cloud hosted or Virtual machine environment is unfortunately not a single click step and does require a (technical) person to remote desktop to the server to run the upgrade steps.

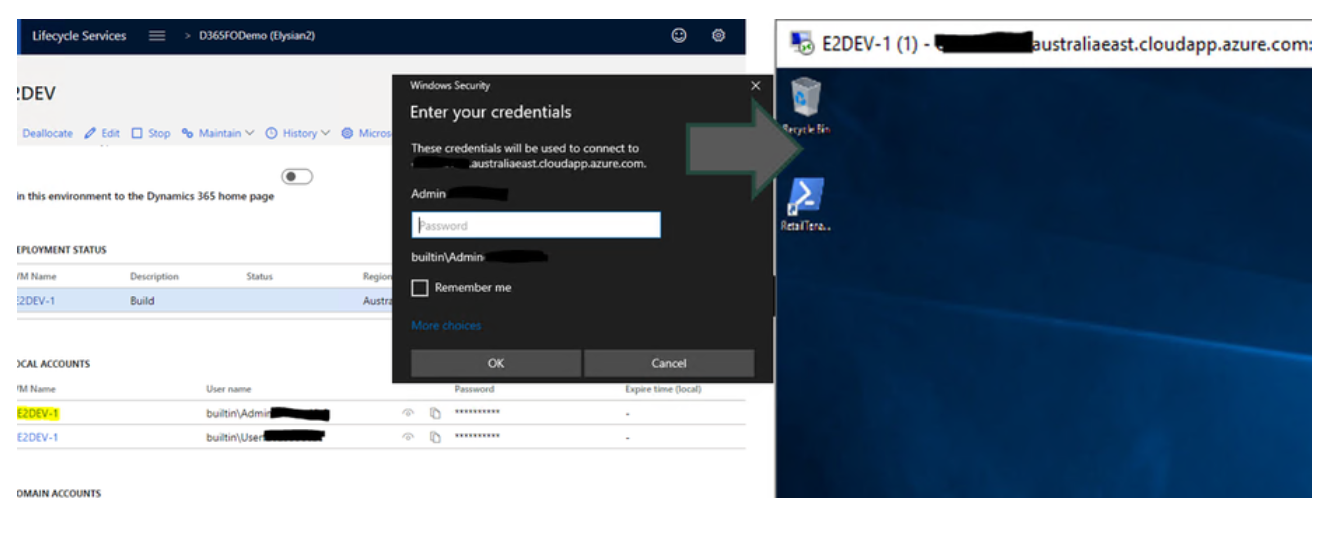
Connection details for the RDP are available under the environment details in LCS.
Click the hyper-link VM name to download the RDP shortcut and login using the credentials listed.
Database Schema
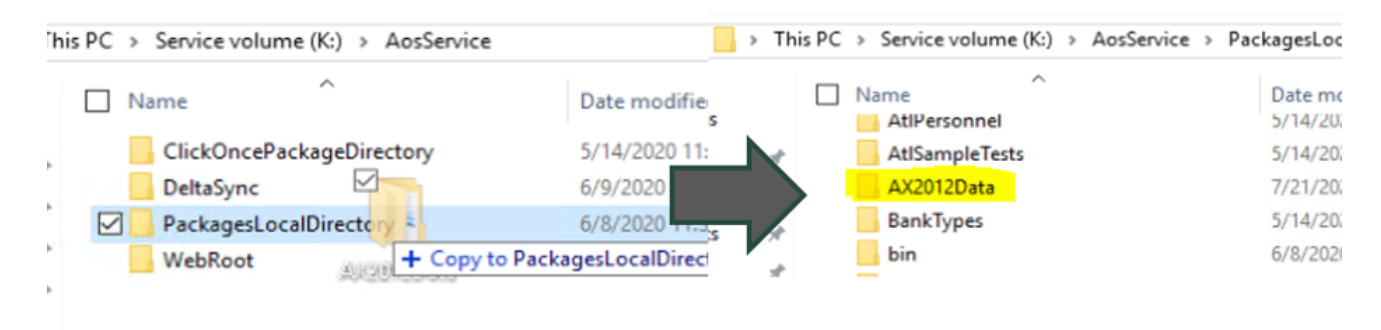
Copy the AX2012Data folder to the PackagesLocalDirectory folder.
In Cloud hosted environments this is K:\AOSService\PackagesLocalDirectory
In Local VMs this is C:\AOSService\PackagesLocalDirectory
This adds your custom schema to the main code base where we can build the model and generate the DLLs so the environment recognises these new tables and fields.
Ensure you copy the top level folder – containing another AX2012Data folder beneath it as well as a Descriptor folder.

Run the provided Powershell script to build the model and create the DLLs for the D365 environment to recognise the new objects.

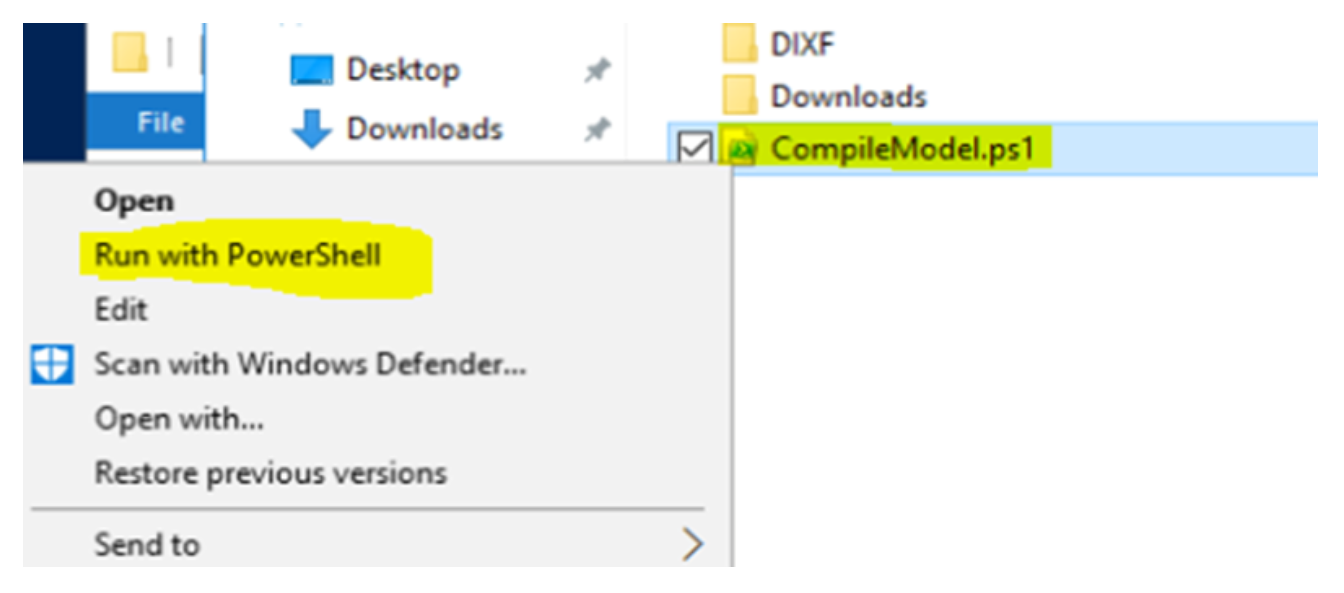
You will see a build log generated inside the AX2012Data folder which will list any errors.
Note: if there are any errors they need to be fixed or none of the tables and fields will be created. (you can delete the offending XML file to quickly move on and let the rest of the objects build.)
Database Restore
After successfully building the Custom Database schema we are ready to restore the AX 2012 database.
Download the backup file you previously uploaded to LCS
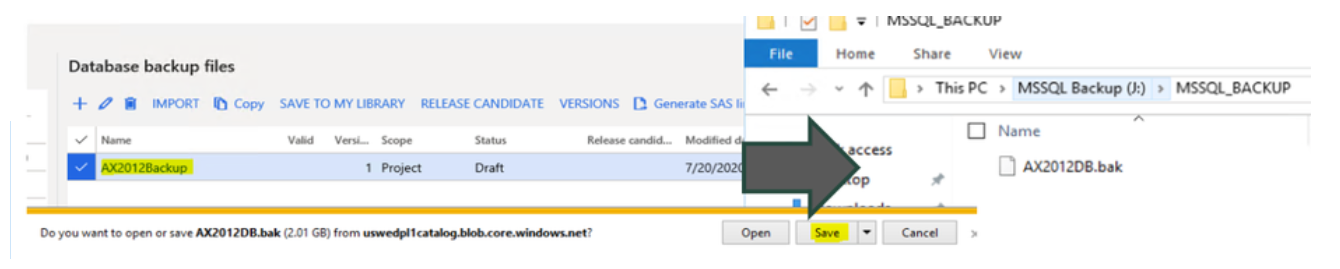

Save the file to J:\MSSQL_BACKUP and ensure it is called AX2012DB.bak
Use the provided SQL script or Powershell script to restore the database to the D365 SQL server instance.

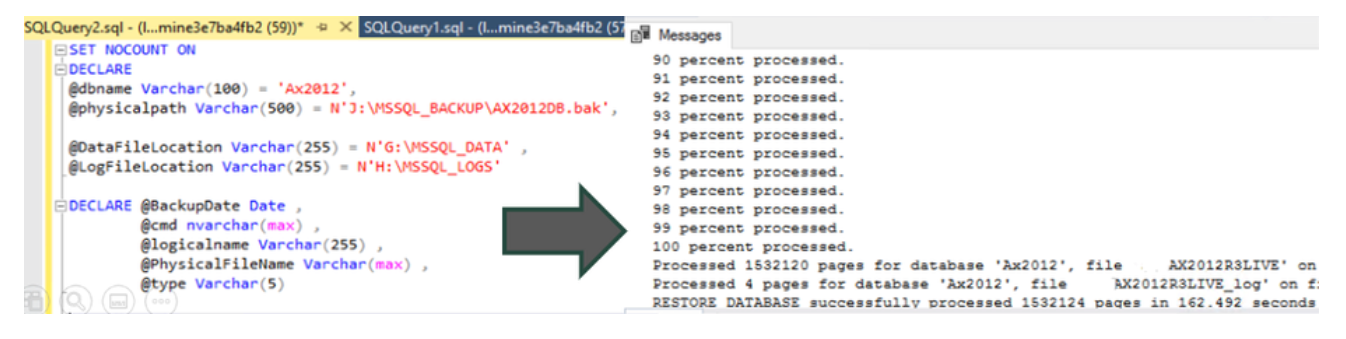
Note: the database name will need to be called AXDB and replace the existing one (the powershell script will do this automatically).

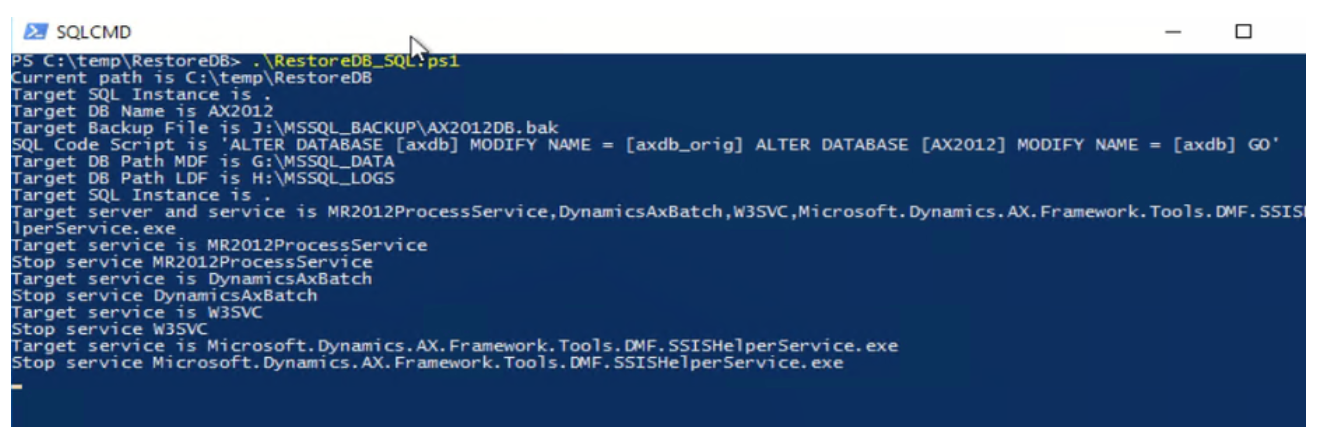
If you are not using the Powershell script - the ManagementReporter, AXBatch and WWW services need to be stopped before you can rename the existing AXDB database.
5 - Perform D365 Upgrade
This is the actual upgrade.
Download the AX 2012 upgrade package to the server
Ensure you unblock the downloaded zip file

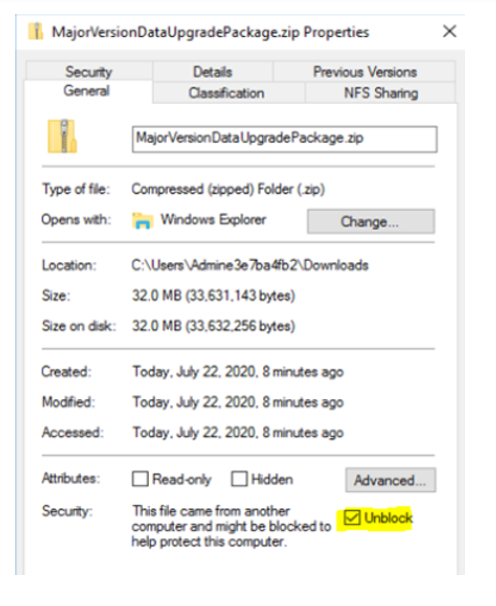
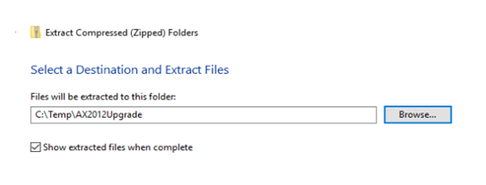
Extract the upgrade package to C:\Temp\AX2012Upgrade

Execute the upgrade script (Run as Administrator)
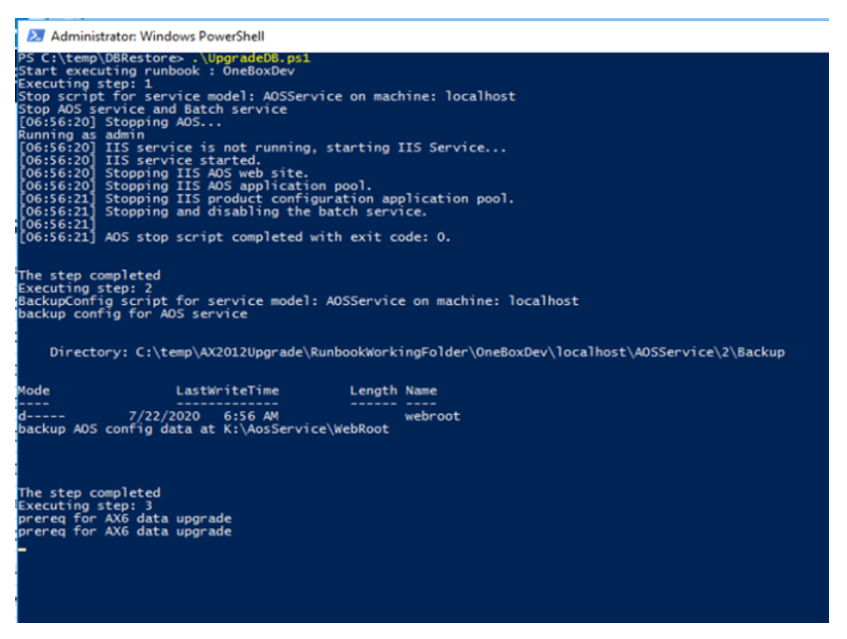

Use the included UpgradeDB.ps1 script to automate the process
Note: You must have extracted files to C:\temp\AX2012Upgrade
The ideal scenario is that you get all steps completed without any error and then you will be able to use the new environment.
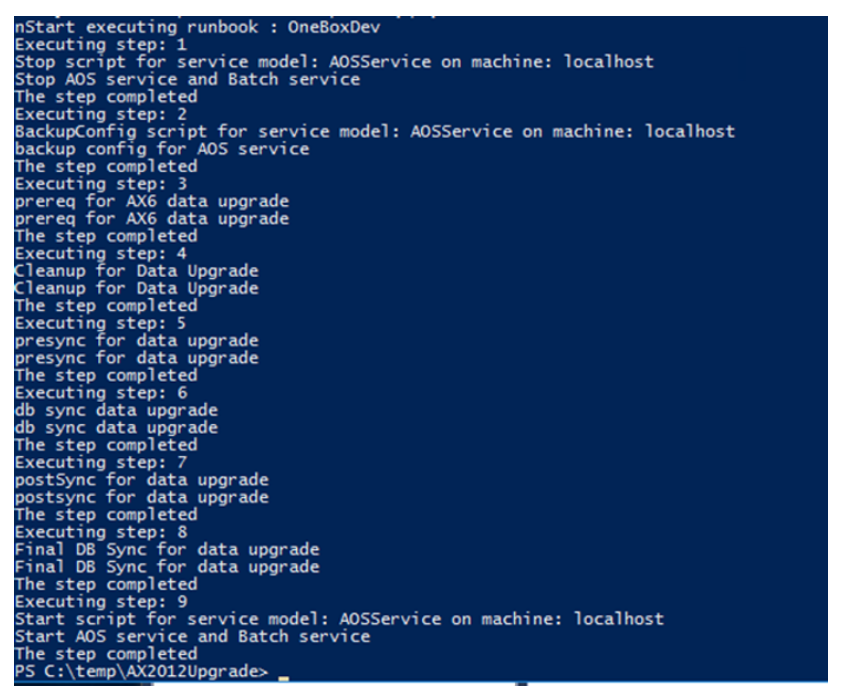

However there is a high likelihood that there will be errors during this process.
You will need to resolve any SQL errors (such as unique index violations) and then continue the upgrade process. To continue after fixing any errors execute the following command:
.\AXUpdateInstaller.exe execute -runbookid=OneBoxDev –rerunstep=X
Replace X with the step number that failed. It will then run that step and continue executing the subsequent steps.
Now you can open the environment and experience D365 with all of your existing AX 2012 data.
All scripts listed above are available here:

AX 2012 to D365 Finance and Operations Data upgrade in a day*